![]() Home
|
The Boat |
First Mate
|
Admiral |
Guestbook
Home
|
The Boat |
First Mate
|
Admiral |
Guestbook
Date: 25 October 2018. Hiding the VHF Hole.
© janice142
The former VHF radio was high on the port side of the pilothouse overhead. Unfortunately my left side no longer works quite so well. Therefore reaching up was becoming problematic. The solution was to place a new VHF on the starboard side in a more easily accessible spot. That left an ugly hole behind. Here's how I covered the hole for a dollar.
For the record, my fix is not
perfect. It does fit neatly into the Good Enough category though.

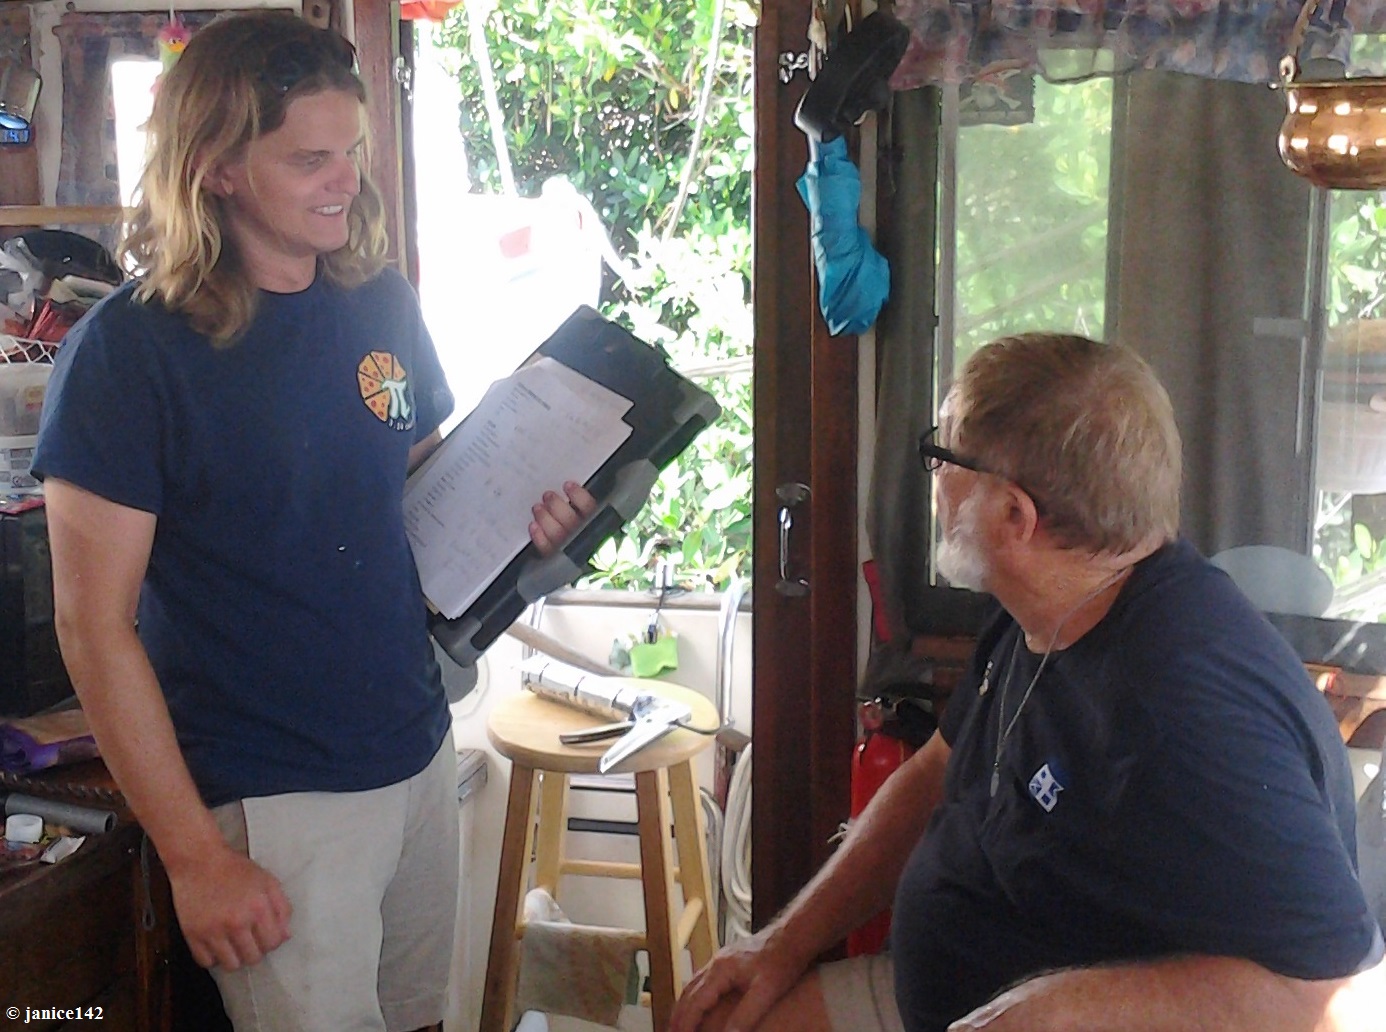
The main impetus however was this picture of Mike
from
Marine Specialists.
The hole by my VHF radio microphone looks dreadful. I'd like to fix
that.

I want to hide the ↑
hole and replace the cheap wood that is icky.
Now that I've solved the pilothouse drips via SilPruf I intend to make it look pretty up there. The starboard side damaged wood is quite large. I decided to first tackle the smaller slot on the port side where the old VHF was mounted.
|
Side Note about
Marine Specialists of Treasure Island, FL:
Website:
http://www.themarinespecialists.com/ |
|
But I digress...
My former VHF radio was mounted in the overhead on
the port side.
The VHF was replaced and moved to a better location on the starboard
side.

A small panel of wood covered the hole. It too had
staining from water intrusion.
Incidentally, the spots where water came into the pilothouse were finally located. All three were from wires not screws. Both running lights, port and starboard, have wires that pass from outside to in. Those wires after 30+ years had developed drips. The third place was where the original horn wires came inside.
Not a single screw was involved in
the drips. That is
where I initially was "certain" the leaks came from.
The Solution was a generous glob of SilPruf. Voila: ZERO drips so far, knock teak! I extolled Silpruf in the recent article Hurricane Michael (with Carrabelle pictures).
After I removed the wood panel over the old VHF
slot, I needed to scrub the area.

Fortunately I keep a small container of spray cleaner in the galley
so clean-up was a breeze.
If an item is used frequently I try to have it where it is most convenient. I found that storing all my cleaning supplies down by my head was problematic. If I spotted something that needed a spritz of cleanser, the thought of going below to grab the bottle would kick me into the "I'll do it later" mode.
Now, because I have that small spray container
ready behind
my sink these little chores are easily done with no muss/no fuss.
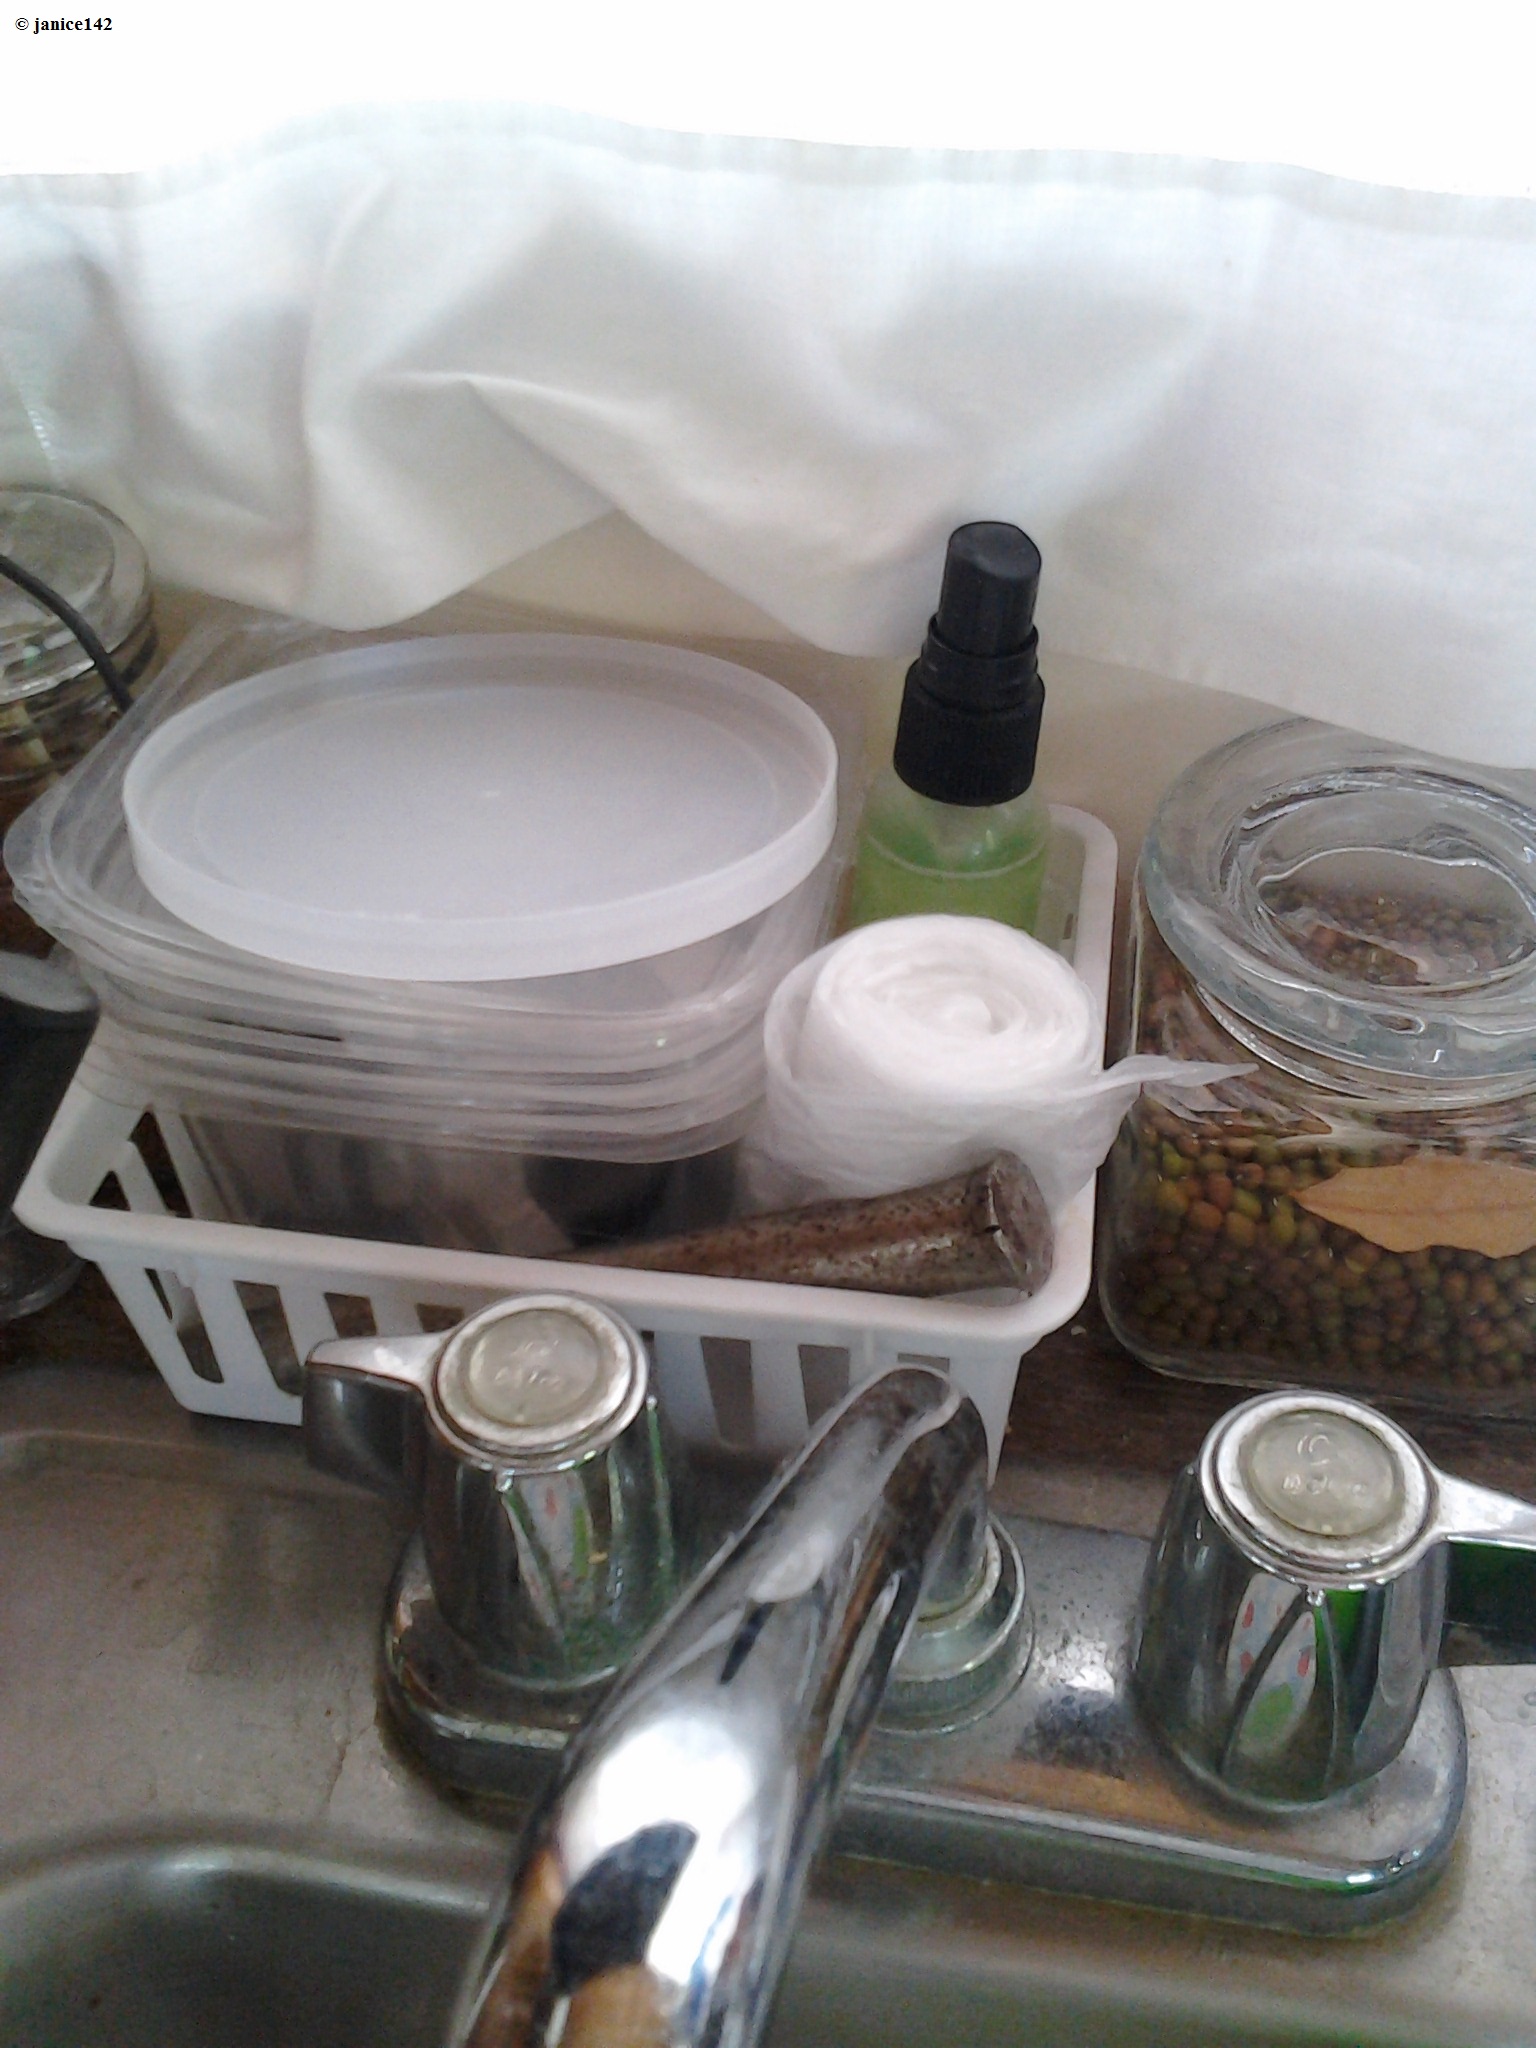
Making my world operate as simply as
possible is turning into my mantra.
I like to call this an efficiency kick. It's really that I want to
make things easy.
As for the overhead VHF slot on the port side that looked so icky, I needed to replace the cover. The experts suggest that black matt-finished Formica is a great option. I love the look of Formica. The problem is that my cutting skills are seriously lacking.
A secondary issue is that Formica has to be ordered in large pieces. That would cost far more than I can justify. And too, I have seen the cuts I make with power tools. It is not pretty.
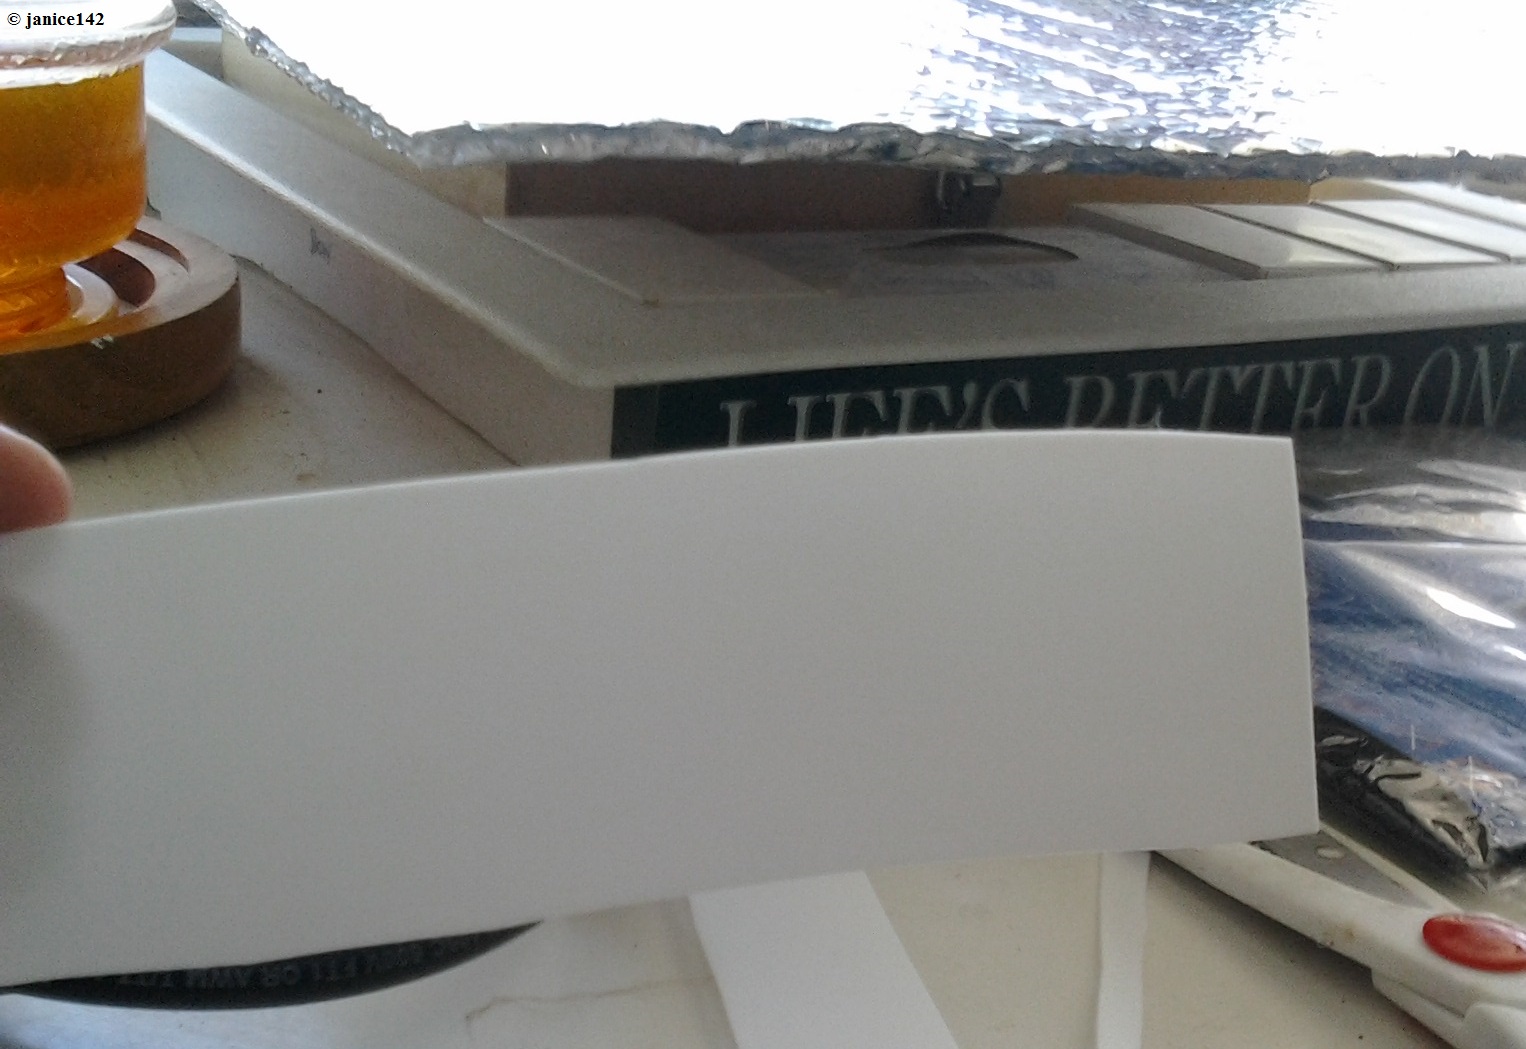
Thus I decided to go to the Dollar Store. There I found a white plastic dish pan. It was slightly flexible without being brittle. I was certain I could cut it with scissors.
I traced the small panel that had hidden the VHF
hole with pencil.

Then I cut out the piece from my white plastic.

I placed the wood atop the plastic. Then I forced the ↓
SCREWS through to create matching holes in the plastic.

By inserting the screws into the original holes on
the wood panel I knew they would match the overhead.
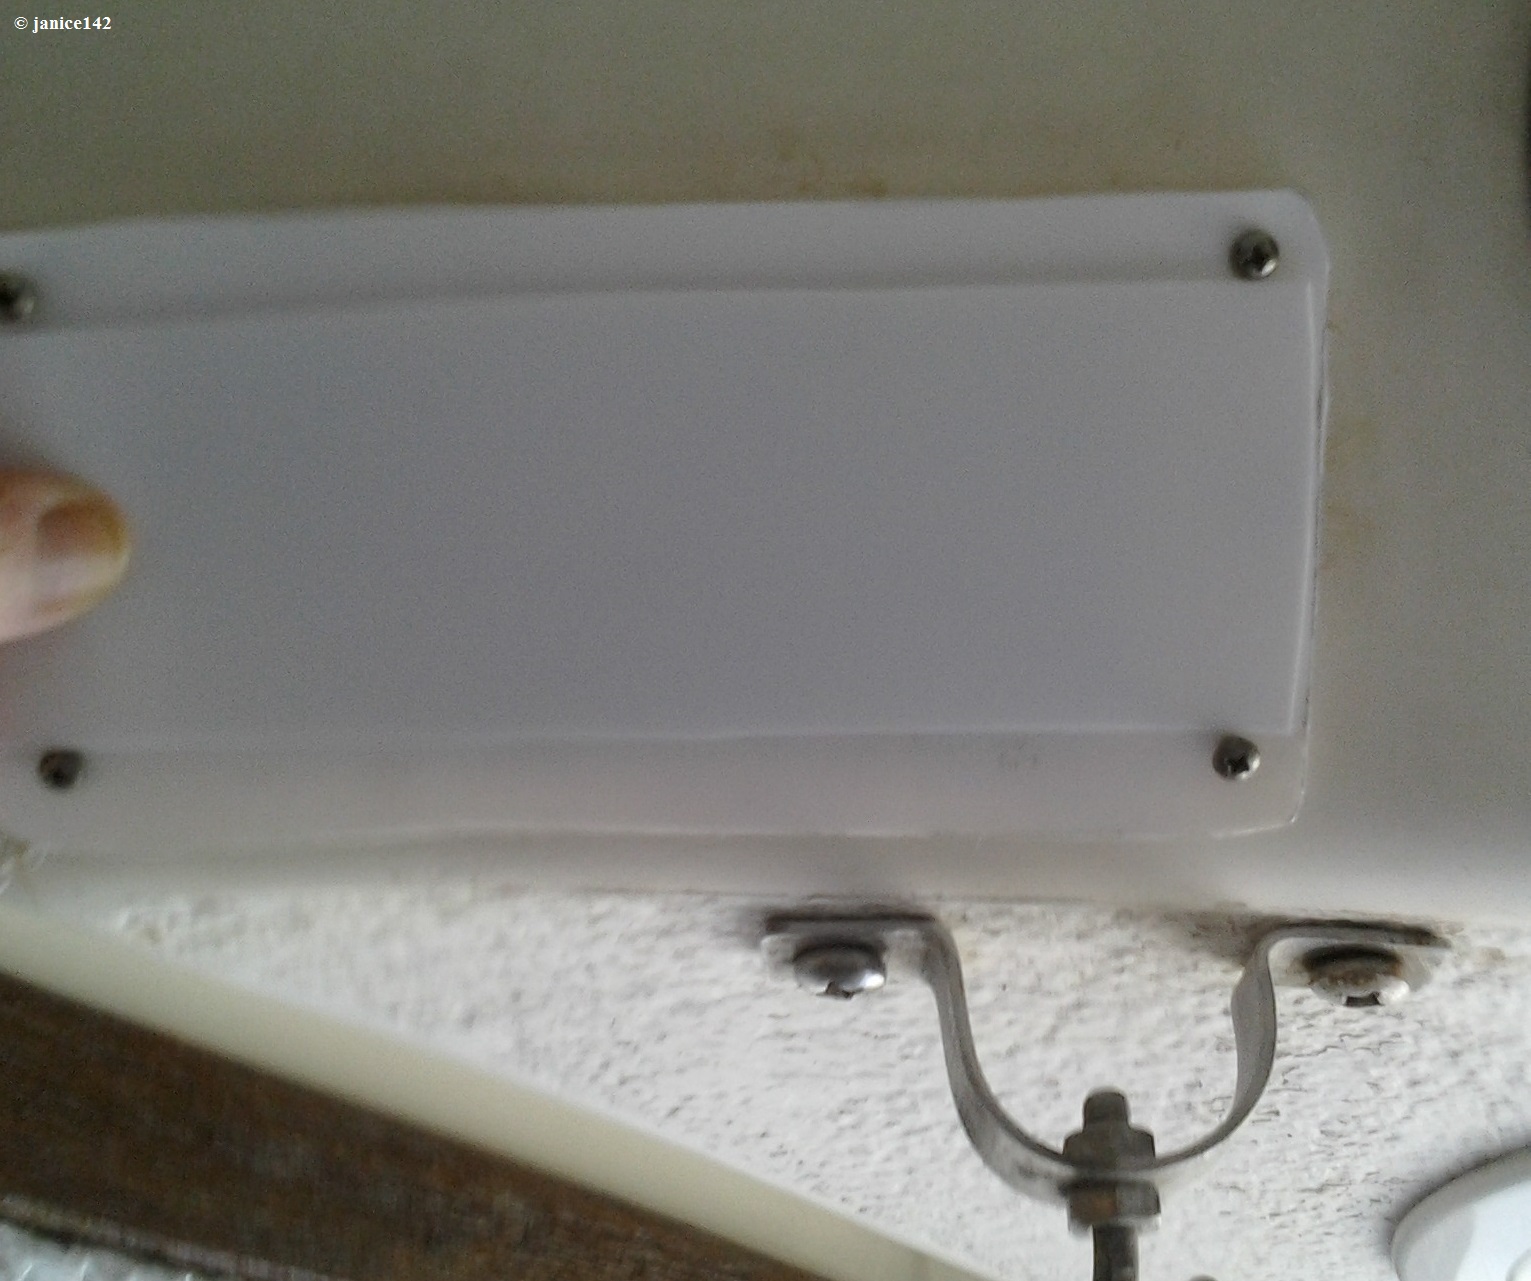
Finally I screwed the plastic piece in place. It
looked bad.

I could see there was a darker place behind the
plastic.
I wanted to hide the dark outline where the former VHF was mounted. To conceal the shadow I measured between the screws. My idea was to slide in another piece of plastic between the screws holding the plastic in place. Thus, I would have two layers of white in the center.
From the scrap plastic I cut said piece:
To make sure it would fit I held the second
filler piece to
the plastic panel.
It was the proper height to slide between the screws.
The length would cover the gap without being too wide.
Finally I inserted that second piece of plastic between the panel
I made and the overhead.
|
Though not perfect, this is better than when I started. |
||
| Before |
During |
After |
I still am not ready to tackle the larger panel on the starboard side. In the meantime I am looking for a bit thicker plastic. Perhaps something like a Rubbermaid container will be a better option. For now, the fix is certainly Good Enough.
|
What I
learned: Plastic dish containers that
appear opaque do let light through. Buy better plastic.
Although I utilized scissors an
X-Acto Knife Set
(affiliate link) would have been
easier to use. I also should have pre-drilled the holes
rather than screwing through the plastic.
|
Next time with what I learned I believe my solution will show better results. That larger panel on the starboard side also has switches in it. It will need to be sturdy. The sort of plastic I need is really a thrift store type item. I'll be keeping my eyes open.
Thanks for reading.
I'd love to learn I'm not the only one with orphan holes in her boat.
And, how have you hidden your old equipment slots?
|
Regarding the Comments Section, found at the end of every article:
|
COMMENTS:
© 2018, 2023
Categories: Characters, Gear, In the Bilges, Locations, Money,
Halloween 2018 ~
Previous Post ... ![]()
... Next Post
~
Breezy the Sea
Urchin Octopus (and sprouting too)
The Archive holds a running list with synopsis of published articles, and links to same.
Every gift helps.
The Cruising Kitty is what boaters refer to as spending money. There's never enough aboard Seaweed!
I am also an Amazon Affiliate.
![]()

My Buddy, and his girlfriend...