![]() Home |
The Boat |
First Mate
|
Admiral |
Guestbook
Home |
The Boat |
First Mate
|
Admiral |
Guestbook
Date: 11 October 2015. When it's Not Square (how to fix)
© janice142
Of late I have been doing a galley overhaul. A new refrigerator has already been tucked into the corner by the door to my cockpit. Next, I wanted a countertop above the reefer. Of course she is a boat, right? Nothing is square or even on Seaweed. Here is how I resolved that problem. With one cut my shelf fits flush against the back bulkhead.
She is a boat,
so of course there will be issues in any project. This time
I was stymied for a while because stuff simply isn't square on my
Seaweed.
Figuring out what is wrong with that corner of the galley would take longer than I shall live. I am sure others might want to make it all perfect. My goal was to fix it so it would look okay, serve the purpose, and be Good Enough.
Perfection is the
enemy of Good Enough.
|
|
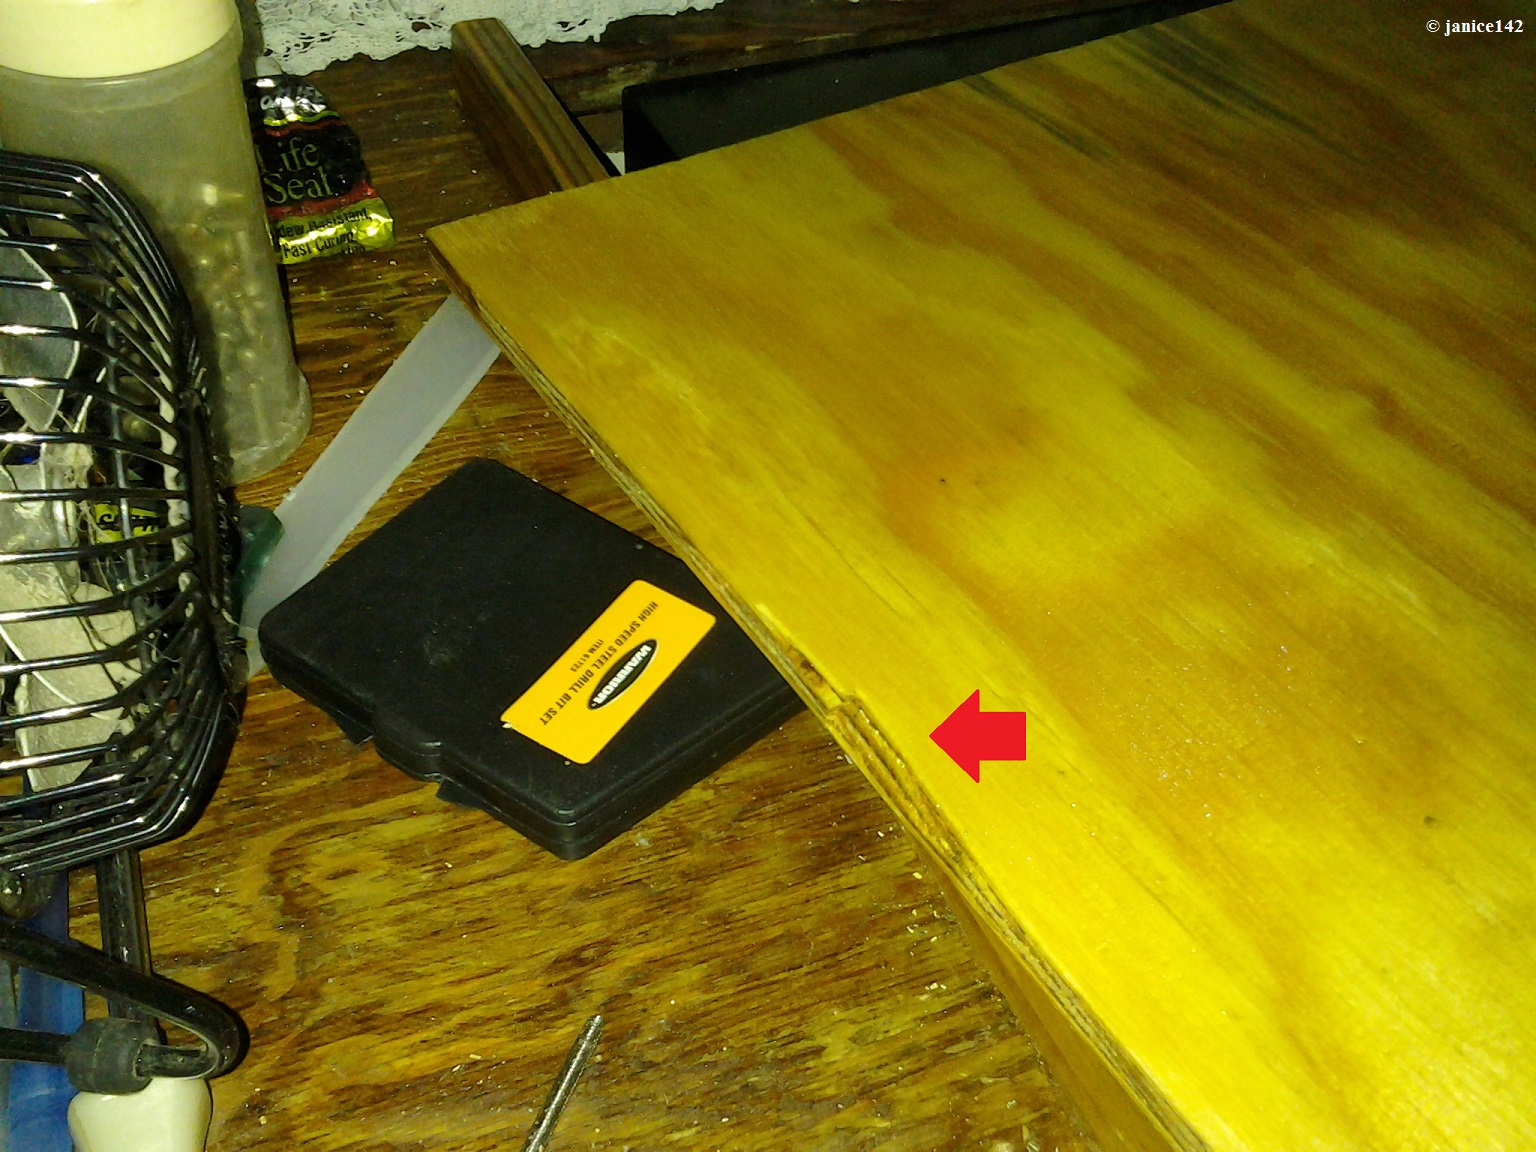
You can see the back edge
starts out wide and gets narrower, the further aft (to the
right) you look. The
RED ARROW is one end of my locker support. The
BLUE ARROW (bottom left corner of
picture) is the other end. And that piece of trim (the rope
like wood) is the "straight line" I need to work with. Argh. She is a boat and I wish to make her look nice. |

The next step in the project was to measure and mark the wood where it is wrong/not square. This is how I did it: Remember how in the previous picture the wood that looks like rope is the straight line I need to match? Well, I evened up the shelf wood making it look square on the left and back sides.
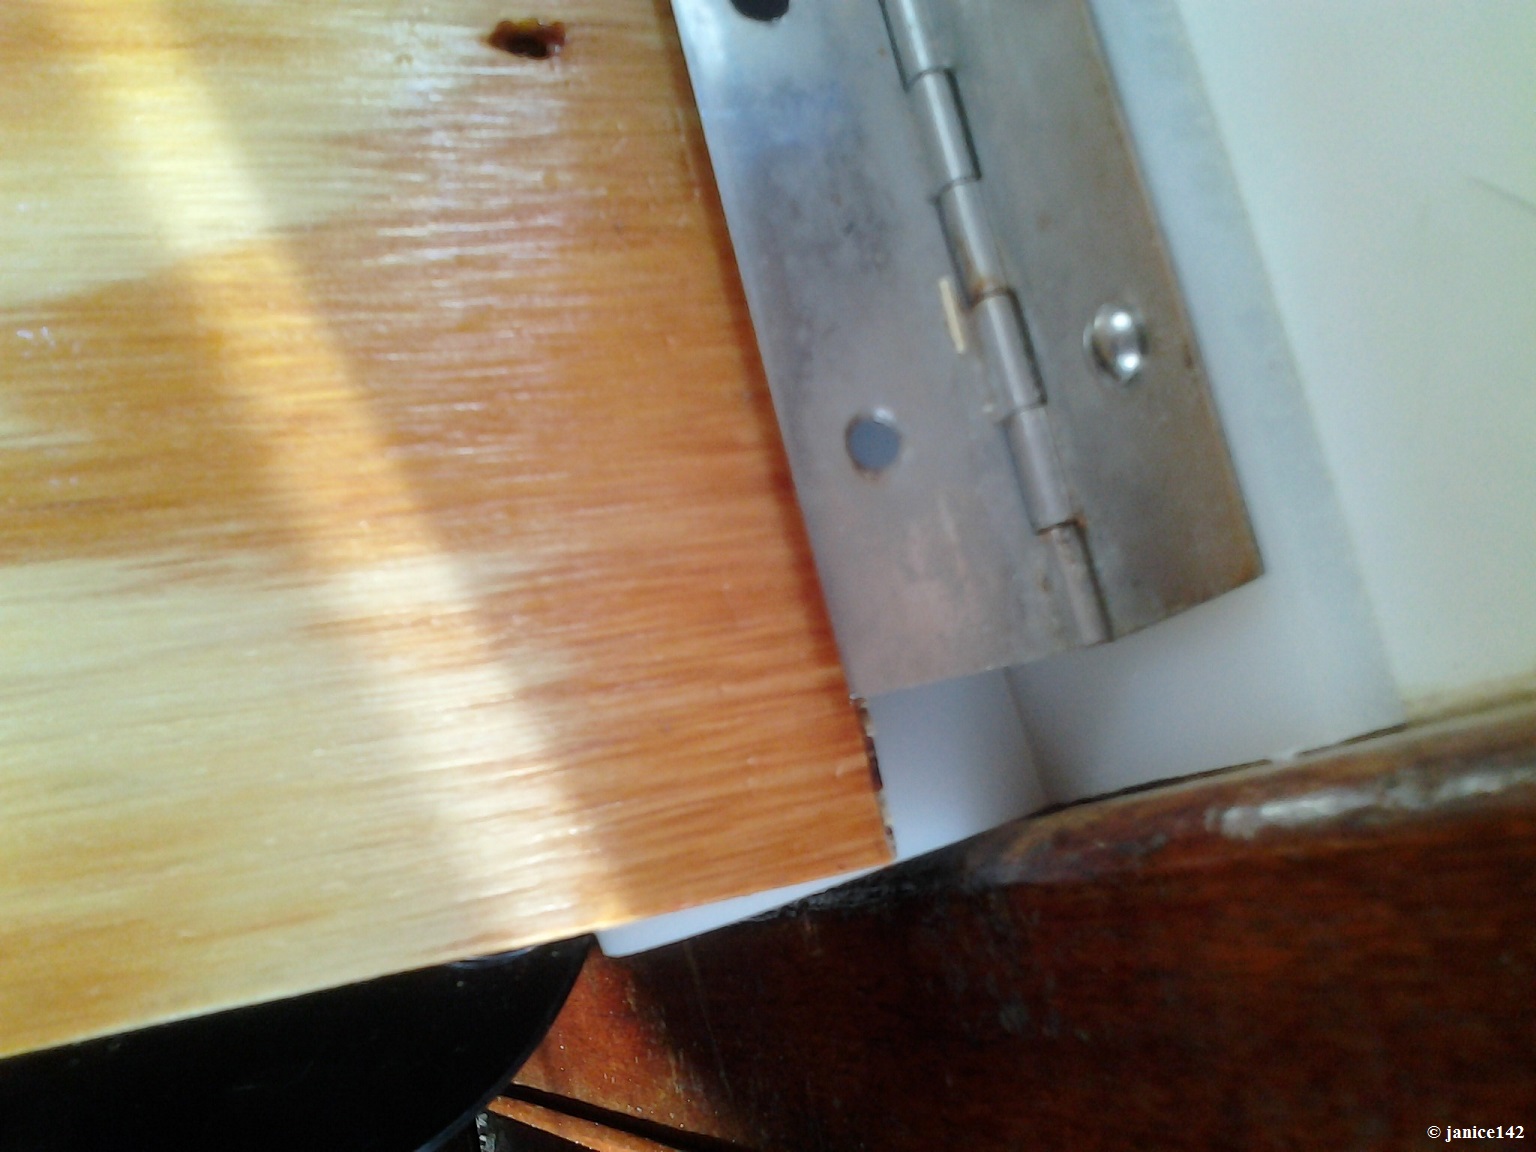
Then I took my pen and marked the outside edge of the hinge. I knew that would be a straight line when I moved the wood further aft. Next, I cut the wood on the edge that will butt up against the back bulkhead of Seaweed's galley.

I could have tried to cut
it again. Sawing off another 1/8" an inch arrow straight, and it would
be perfect. However I am as demonstrated not the best at cutting.
Thus I will
simply sandwich this between the backing plate and the hinge.
Nobody will ever see it again. After all, this is Good Enough. |
|
Finally, it was time to attach the new counter to the hinge on the right side. First I slid the wood right up against the bulkhead. Then I used a magic marker to mark where to drill the holes. It was easy to draw a circle where the holes are in the hinge.
Recently I bought myself a new $12 Harbor Freight drill. It is working just fine. My old one finally gave up the ghost. I had repaired it more than one time. If you are interested in the details, the DeWalt Drill Fix article is a how-to make a rechargeable drill function when it stops doing so.
SHELF BOLT
HOLES, WOOD I REMOVED to square up
the counter,
and
BOLTS THAT GO THROUGH THE BULKHEAD
and outside backing plate..

You can see THREE HOLES that I drilled through the aft bulkhead. Those go through the hinge, the inside backing plate, bulkhead and then the outside backing plate. Whew!
|
In the photo above you may have noticed the window frame sticks out about 1/4" from the aft bulkhead. With the addition of the cutting board behind the hinge, my shelf will fold up flush against that window frame.
And yes, there are fancy hinges that can accommodate this issue. I do not own them. Instead I opted to use what I had. It is good enough.
|
I also added another piece of the cutting board under the shelf. It extends out a couple of inches from the bulkhead. My theory was that I wanted more than just the one inch hinge supporting the wood. The additional support piece below should provide a bit more strength at the edge...
As I started to put the bolts through the bulkhead I added a touch of Boat Life Lifeseal to the hole. Ditto, outside. When I slid on the fender washer I added some Life Seal there as well. Even in a driving rain, water should not enter Seaweed.
|
Aboard Seaweed I like to have supplies so that when a project
comes up I what's necessary is already here. For me, having BoatLIFE products
is a given. I know a lot of folks swear by 5200. For me I prefer these two. They seal well and can be removed later if desired with relative ease. |
|
 Boat Life Lifeseal Sealant Tube, Clear or caulking gun size Boat Life Lifeseal Sealant Cartridge, Clear |
 Boat Life Sealant Lifecalk Tube, White or caulking gun size Boat Life Lifecalk Sealant Cartridge, White |
|
↑ affiliate links ↑ |
|
|
Though these products come in the larger caulking gun cartridges, I prefer the smaller tubes. If I had a large project I would buy the bigger size. For me, the smaller quantity is a money saver. I do not waste it, nor does it harden before use. |
|
Where I used
Lifeseal
in the cockpit is under the overhand. There is
a bit of protection
from the elements by virtue of the cockpit's design.
|
Position of Screws is Important |
|
Previously I had filled in
every hole on both sides. What happened was the heads of the
screws interfered with the folding process. They bumped
together and
stuff would not lay flat when folded.
|
|
To reiterate, the trick is simple:
First, I aligned the left and back side so it is flush and even on those two sides. I know the shelf wood selected is a-okay and square.
Next I slid the wood forward (toward the bow of the boat) about one inch to take into account the width of the hinge.
Then by marking on the edge of the hinge I knew what had to be removed to make the shelf fit flush against that back bulkhead.
Finally, I cut away the part that made it look crooked and called it Good Enough.

There is more in this project. Like all things Boat, some degree of Job Creep occurred. I added a microwave. The next step will be in securing said unit to the shelf. But that is a project for another day.
Although I am not an expert, my shelf looks square and even now. It is not perfect. It is Good Enough.
I am so pleased to have a refrigerator that fits a cantaloupe. And there is a light on the inside too. My too small old reefer did not have a light. I tell you, the miracles of modern living are simply amazing.
In the meantime, I am enjoying ice cubes in my tea. Having a reefer filled with produce is a real treat. Down here there are lots of choices at the grocery store. I am having a blast eating cantaloupe every day. This is decadence.
To you and yours I wish much happiness and plenty of decadence afloat too.
Is there a better way to even up crooked stuff on a boat?
Have you used BoatLIFE products? I used LifeSeal on a scupper drip, and it worked a-okay.
|
Regarding the Comments Section, found at the end of every article:
|
COMMENTS:
© 2015, 2023
Categories: Galley, Gear, In the Bilges, Recommendations
Keeping in Touch with Grandchildren ~
Previous Post ... ![]()
... Next Post
~
Rescue Tape
Saves Boats
The Archive holds a running list with synopsis of published articles, and links to same.
Every gift helps.
The Cruising Kitty is what boaters refer to as spending money. There's never enough aboard Seaweed!
I am also an Amazon Affiliate.
![]()

My Buddy, and his girlfriend...