![]() Home |
The Boat |
First Mate
|
Admiral |
Guestbook
Home |
The Boat |
First Mate
|
Admiral |
Guestbook
Date: 14 June 2015. Hatch Cover How-To (Sunbrella and Tenara too)
© janice142
The forward hatch on Seaweed has glass. That is wonderful during the wintertime when it acts somewhat like a greenhouse in letting in the sunshine and warmth. Plus too it is fun to watch the moon when at anchor. I can see the stars as they track across the sky. Generally speaking, I do like the glass. Summer is the exception.
This time of the year that glass has one not so pleasant consequence. The sun shines in and it turns my cabin into an oven. That is definitely unwanted. I fixed it though, and for just a couple of dollars.
Now my new hatch cover is not perfect by any means, however it is good enough. And you can do it too. As detailed in the Screening My Hatch (eBay advice) article a screen allows me to keep the hatch open and let in breezes. The sunshine though? Well, it negated the cooling effect of the winds. I needed a new solution.
|
Sunbrella stuff |
|
|
Of course buying a specially made
hatch-cover was an option. Made with *Sunbrella fabric it would be
expensive. That choice did not meet my needs for time nor cash.
|
|
|
Colin and Jean stand on the
bow of Lily Maria, their Thompson44: |
|
|
Usually what fails on boat canvas
is the thread sewing the panels together. There is a solution.
Specify
Tenara brand Thread for your project.
Tenara is Very Expensive,
and worth every penny of the additional cost. If you want your outdoor fabric items to last, that brand thread is what you should choose. The better canvas companies all have it, and generally recommend same. |
|


Of course there are other options for hatches. I wanted something to cover the glass, and figured it only had to last for the summer months. In the winter I like watching the stars.
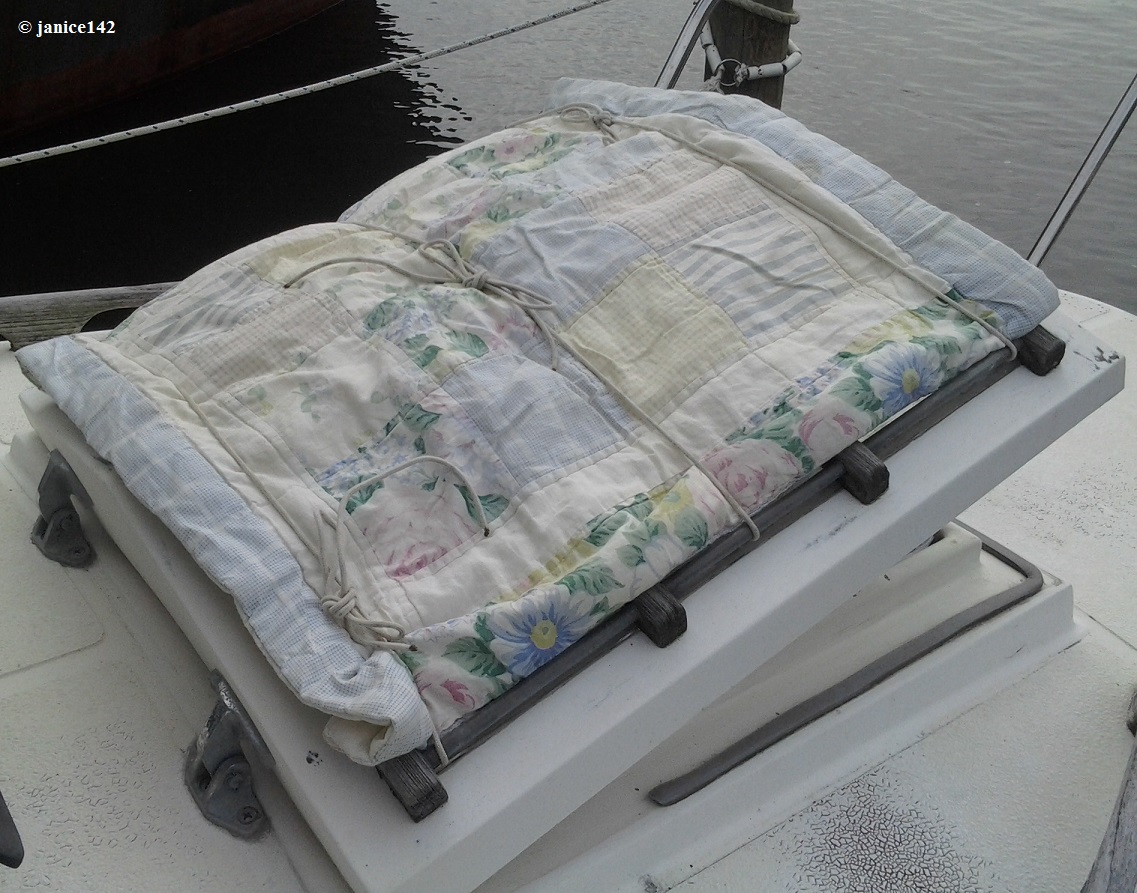
The local thrift store had a pillow sham that from a distance I knew would look off-white. Up close it has flowers. Hey, I may live in a man's world however my little piece is definitely feminine. Also the sun will fade the flowers sooner rather than later.

Quite frankly, spending a lot for a temporary fix that will be used for just a few months seemed a needless waste of resources. This pillow sham will not last years. By the time it falls apart, summer will be over.

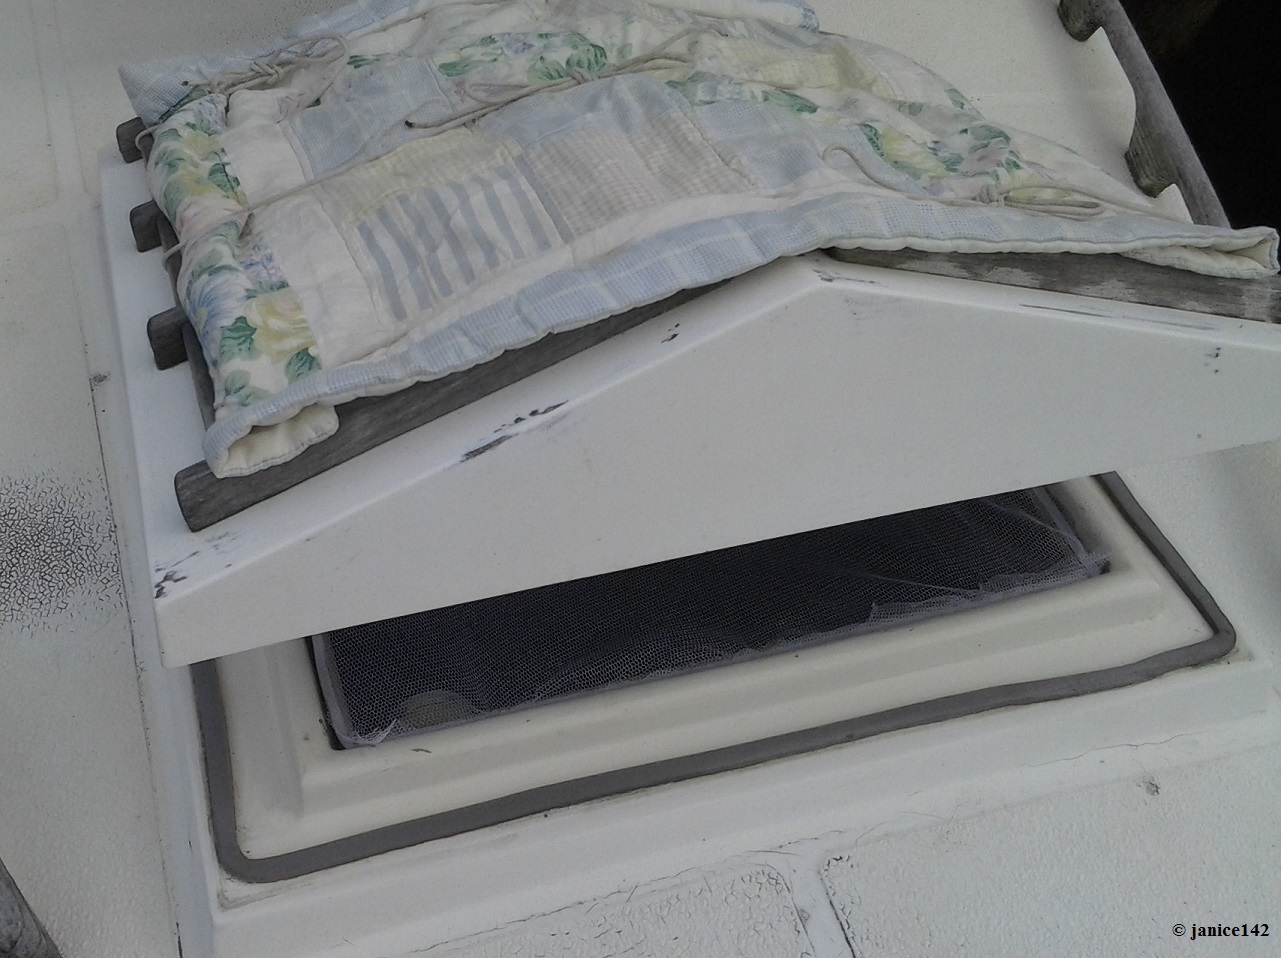
The forward hatch above my bunk has teak trim and bronze bars running fore and aft. You can see the shadows in the above photograph. It's the same hatch as those found on larger *Schuckers.
*Seaweed is a Schucker, made by the Schucker boat company in Florida back in 1983.
How to make a Hatch Cover in fifteen minutes:
List of Items required:
1. A pillow sham. This was chosen because the layers of fabric would prevent sunlight from coming through a single-layer fabric item.
2. Small Stuff. That is what Daddy called thin line. This project is utilizing an old flag halyard (string) from a sailboat burgee. Braided, it is 1/8" in diameter.
Lay pillow sham over hatch, tucking in edges so it is even. Then run the line under the bronze bars, and simply tie it on top. Up close you can see the lines. From a distance? No.


|
Should your hatch not have bars on the outside, this is what you do: |
|
|
Now if you do
not have those
snazzy bars like I do, this is going to be a bit more
complicated. And you will need a couple of hooks in addition to
the Small Stuff. The snaps on a dog's leash work well. You want to attach the
line to the forward edge of your fabric. Sewing back and
forth over the line works well for this. I did mine about an
inch in from the corners.
Next tie the hooks/snaps to the ends. How long you may wonder... Well, inside my hatch into the teak framing I had screwed a couple of eyebolts for another project. My line was tied so the snaps reached the eyes. Attaching was easy too. Snap. Done. |
|
|
The two lines at the
forward end kept my old cover in place quite well. Now the
back end was easier. There are two hinges at the aft end of my
hatch. I simply attached the Small Stuff at 1/3 and 2/3 of the
distance between edges.
|
|
|
|

I admit to liking my newest boat gear acquisition. The pillow sham was $2 at the thrift store and should last me throughout the summer. Then I will wash it once. If it becomes disreputable I will chop it into work rags and use it one last time before disposal. In the meantime, my cabin is shaded and cooler too.
Life is good afloat, and it's a bit cooler now too.
Do you have shades up over your windows?
What do you do in the heat of summer to stay cool?
|
Regarding the Comments Section, found at the end of every article:
|
COMMENTS:
© 2015, 2019, 2023
Categories: Boat Talk, Boats, Characters, Comfort, Gear, Money, Recommendations
Self-induced Work
(engine won't start) ~ Previous
Post ... ![]()
... Next Post ~
Learning about Life Afloat
(a checklist)
The Archive holds a running list with synopsis of published articles, and links to same.
Aphorism Alert: I also was once sooo sure I had made a mistake, but then I woke up and realized it was just a nightmare.... We perfectionists have some really bad dreams. Rich Gano.
Every gift helps.
The Cruising Kitty is what boaters refer to as spending money. There's never enough aboard Seaweed!
I am also an Amazon Affiliate.
![]()

My Buddy, and his girlfriend...