![]() Home
|
The Boat |
First Mate
|
Admiral |
Guestbook
Home
|
The Boat |
First Mate
|
Admiral |
Guestbook
Date: 28 January 2020. Multimeter Repair.
© janice142
My unit:

In my opinion every boater should have a multimeter onboard. If memory serves me, mine came from Radio Shack. It was the bottom of the line/least expensive model sold at the time. All these years later I was still happy with my meter until last November. That is when it quit. Fortunately I was able to make the unit go again, for $1. Here is how I did it.
Diagnosis: The multimeter started to give me odd readings. It would say a battery was at 14.5 volts. A 12-volt battery sitting on the deck not attached to a charging source would never read 14.5. Thus I knew there was a problem somewhere.
Because I cannot
make something that is broken
any worse than it already is, I attempted to fix the meter.
The inexpensive multimeters I am familiar with all have an internal 9-volt battery. I suspected that the battery in mine was due for a replacement. The unit is about ten years old. It was a simple matter to flip over the multimeter to access the screws.
There are two Phillips head screws on the bottom of my multimeter. I removed the screws.

PRONGS
↓
for a 9-volt battery were at one end of the unit.

Prying apart the case was not easy.
I went to the Dollar Tree to buy 9-volt batteries. Unfortunately between the time I had last bought 9-volt batteries and today, there has been a change. Formerly I was able to buy two batteries for $1. They now cost a dollar each.
Because of a limited budget I did not opt for a better quality battery. Although I keep a few batteries set aside for portable items, mostly I simply purchase these as needed.
After replacing the 9-volt battery
I put my multimeter back together.
Side Note: When you first buy a multi-meter you attach the two probes. There are three holes in every multimeter. You want to put the black one into the hole labeled COMMON. The red one is inserted into the one with the fancy symbol that looks like headphones.
|
Almost every
picture on this website can be clicked. |
|
|
|
|
|
By clicking on the two photos above, you should be able to more clearly see the plug with a headphones symbol that is used for testing voltage on 12-volt systems. The red probe goes into it. Black fits into the COM hole. |
|
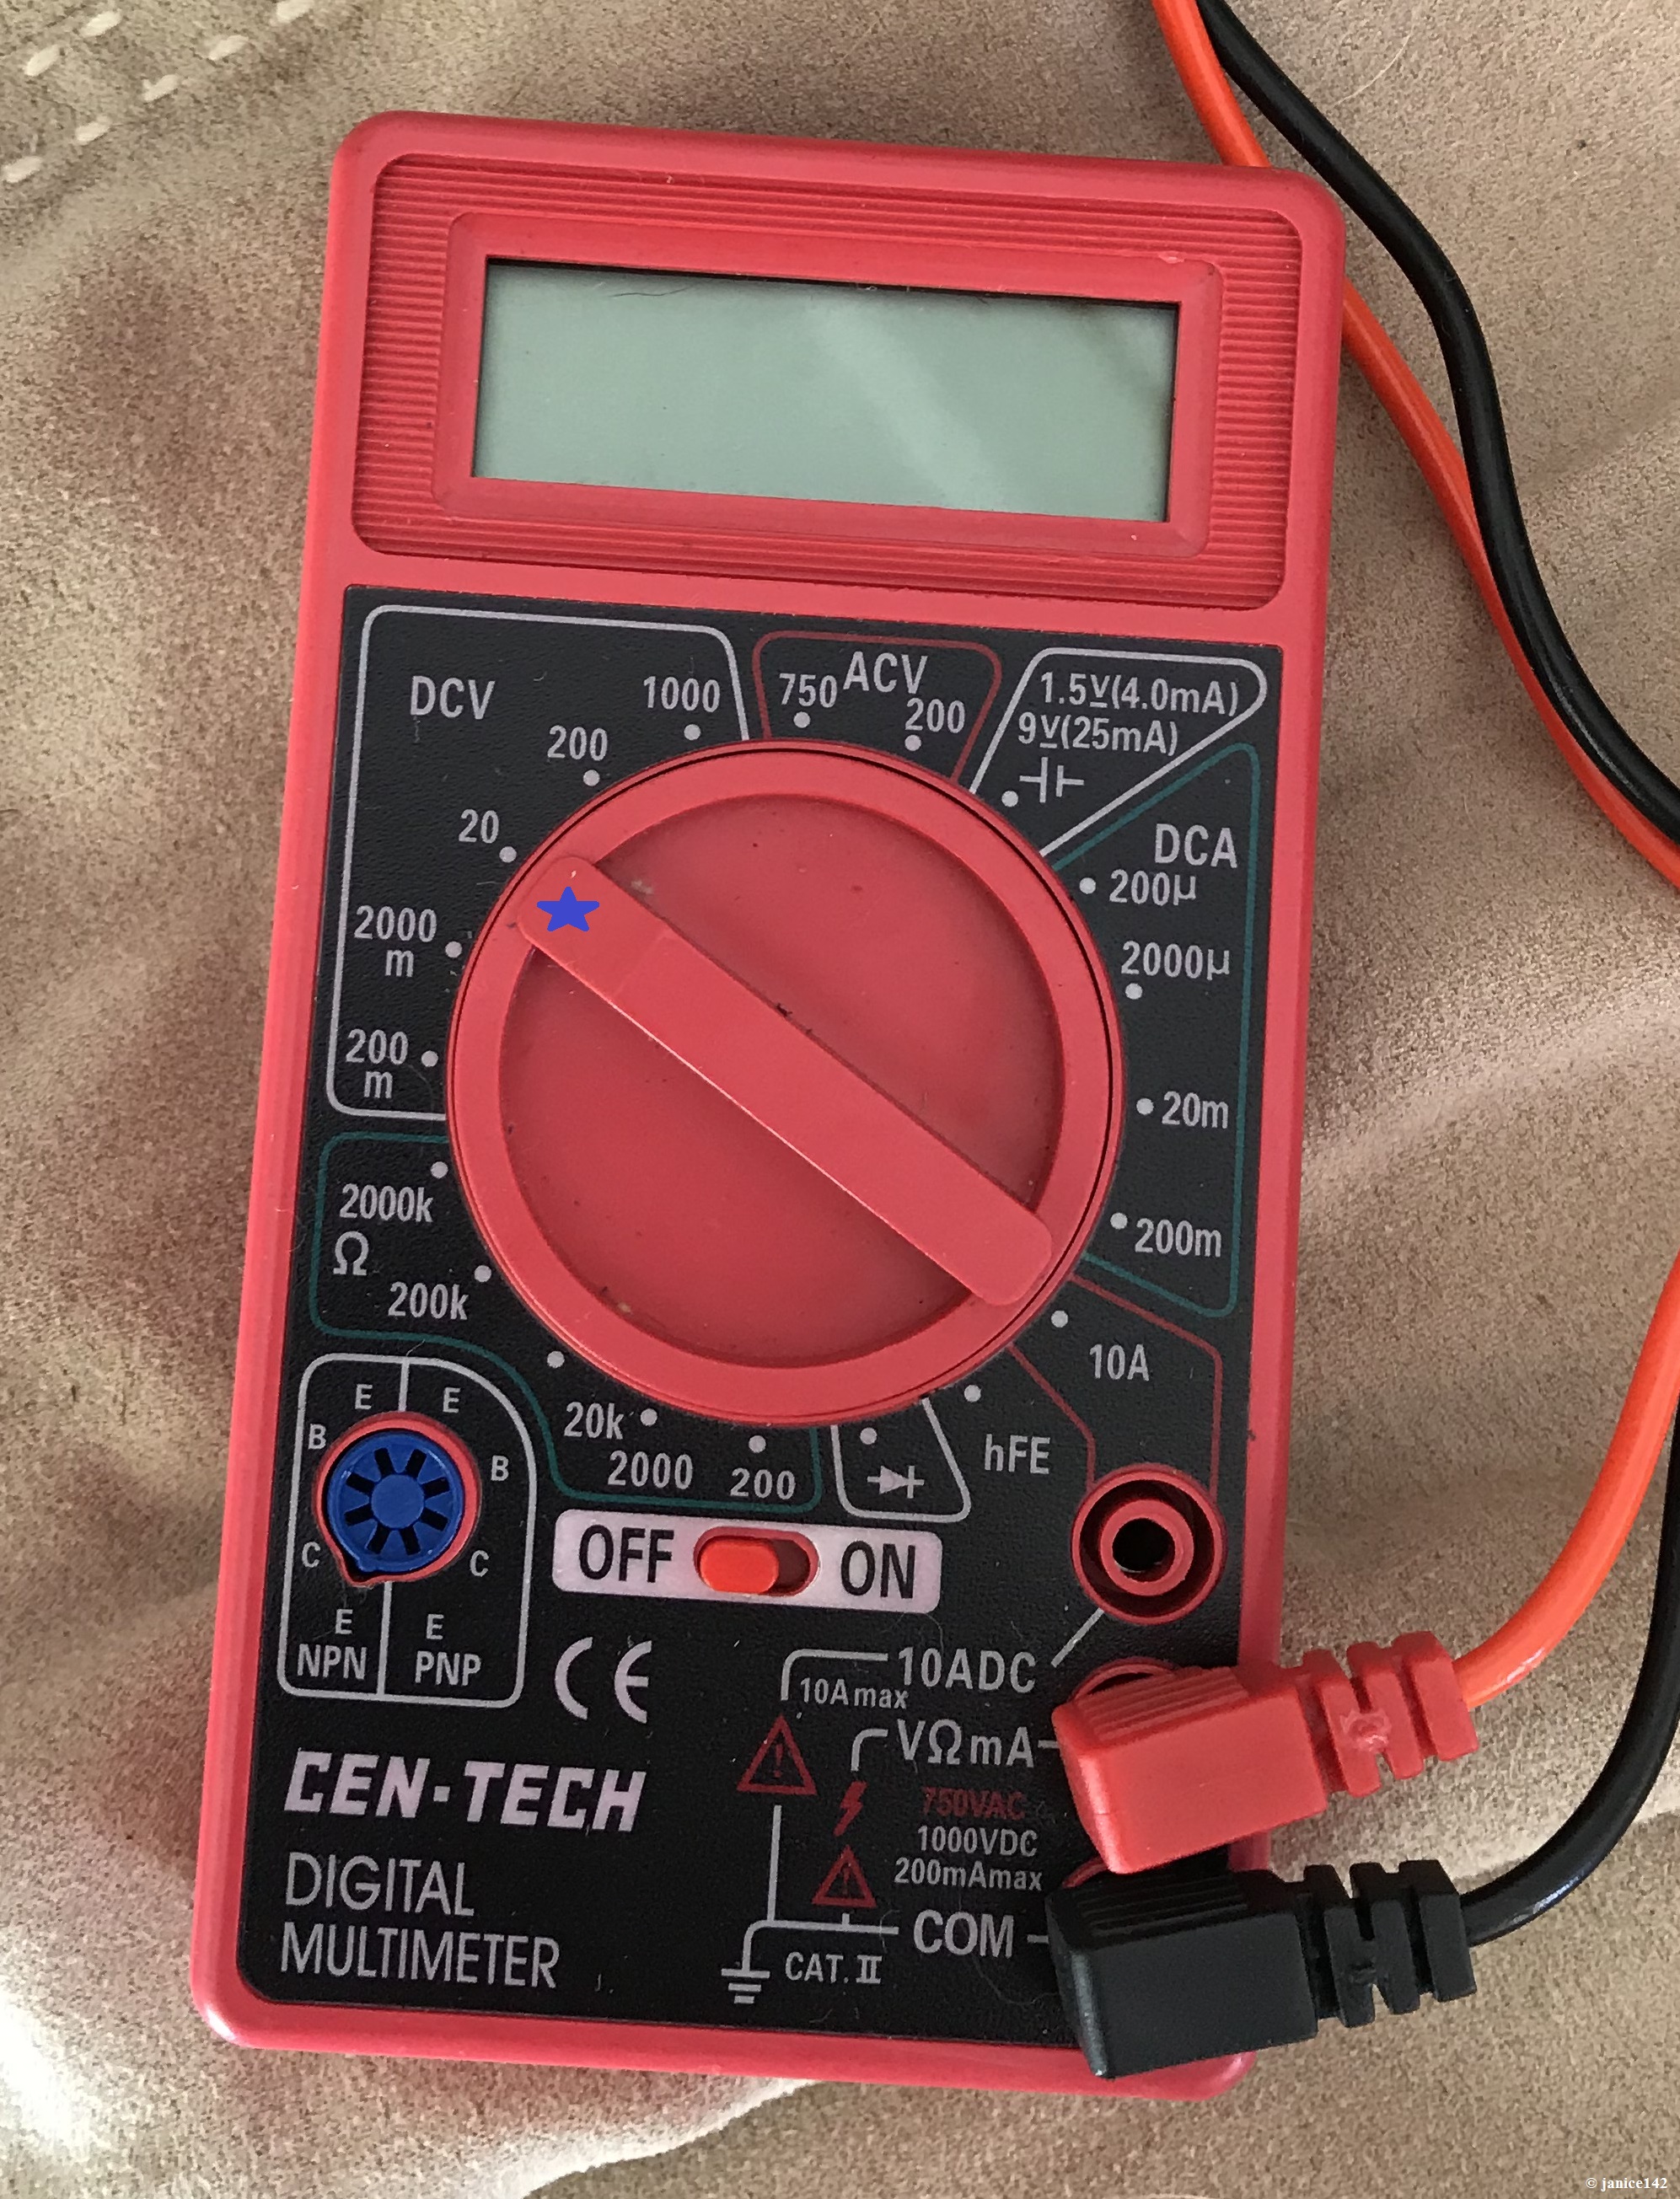
More: To check the voltage on 12-volt batteries I turn the dial three to the left of center. That puts the meter at 20. From there it will register the voltage of said batts. Some meters have an on/off switch. Others have a place to shut off the unit on the dial. OFF is generally located at top dead center.
Though my yellow multimeter did give out on me in November after about ten years, I am still pleased with the unit. After replacing the battery it once again provides me with accurate readings.
Please note that I am not an expert. The expert in all things boat is no doubt Nigel Calder. His tome Calder's Boatowners Mechanical and Electrical Manual 4the Edition is my most frequently referenced and valued how-to book aboard Seaweed. I paid retail for it.
This article is a simple fix-it. Although some may chose to replace an item, the first choice for budget boaters is to attempt a repair. Until someone told me, I was not aware that a multimeter could be fixed. Now you too know, so there you have it.
Thanks for reading. More shortly, on how I actually improved a free Harbor Freight multimeter.
I'd love to hear what criteria you find Absolutely Imperative.
And, have you picked out one particular brand and size that suits you?
|
Regarding the Comments Section, found at the end of every article:
|
COMMENTS:
© 2020, © 2023
Categories: Books, Gear, In the Bilges, Money, Recommendations,
Inexpensive Draft Stopper ~
Previous Post ... ![]()
... Next Post
~
Multimeter Improvement (clamps)
The Archive holds a running list with synopsis of published articles, and links to same.
Every gift helps.
The Cruising Kitty is what boaters refer to as spending money. There's never enough aboard Seaweed!
I am also an Amazon Affiliate.
![]()

My Buddy, and his girlfriend...